
Paint Like A Pro
 Paint like a pro with Orland Park Home Inspection 5 easy steps
Nothing transforms a home quite like a fresh coat of paint. In fact, painting your own house is one of the smartest and easiest DIY upgrades a homeowner can accomplish on their own.
“Summer is the ideal time to tackle a painting project, as the warmer temperatures lead to faster drying times, and you can comfortably leave the windows open for better ventilation,” said Megan Youngs, Product Manager at DAP. “Just remember, a little bit of preparation goes a long way toward creating a professional look that will last for years to come.”
Before reaching for a paintbrush, follow these paint preparation tips from the experts at DAP.
-
Clean Up Your Act
Paint adheres better to a smooth, clean surface. While living room walls may only need a dry dusting, kitchens, and bathrooms, where dirt, grease, oil or mildew can build up, need extra attention. Wash surfaces with soap and water, rinse well and allow them to fully dry. For bathrooms, remove mildew by applying a solution of one part bleach to three parts water and allow the solution to sit for 20 minutes. Then scrub the mildew with a soft-bristle brush, rinse the surface and allow it to dry. Be sure to wear safety glasses and rubber gloves when working with this bleach-and-water solution.
-
Scrape and Sand
Now that the surface is dry, smooth down the surface with a bit of fine-grit sandpaper. This is particularly important if painting over a glossy finish, as paint applies more evenly to dull surfaces. In addition, going over the area with sandpaper will help uncover any cracks, holes or dents that could diminish the final look of your project. Another pro tip is to shine a bright light at a low angle across the surface to spot any problem areas. After you have sanded or scraped the area, wipe it down with a damp cloth to remove any dust or residue.
-
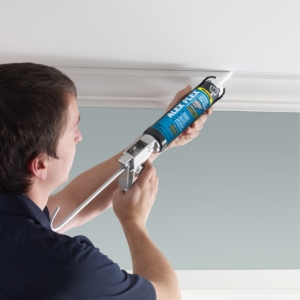
Don’t Forget the Details
Anyone can paint over a wide, smooth surface, but it’s the attention to detail around windows and doors that truly separates a mediocre job from the pros. Use painter’s tape to protect windowsills, molding, baseboards, door hinges and the ceiling perimeter, taking your time to ensure that every corner is properly protected. These areas are also prone to gaps and cracks. Remove any loose or cracked caulking from windows, doors, and trim, and apply a fresh bead of sealant for a smooth, sealed surface. Alex Flex Premium Molding & Trim Sealant is specifically formulated for use on molding and trim applications. The sealant is paintable in just 30 minutes with latex or oil-based paints, saving time and resulting in a seamless, more professional finish.
-
Fill It Up
Now it’s time to tackle the main surface. Cracks, holes, and dents will mar the finished project, so apply spackle to fill in these areas. Open a container of the pre-mixed spackling compound and scoop up a small amount with a putty knife. There’s no need to pile it on. Instead, start with a small amount, and with a shallow knife strike, spread the compound over the hole or crack in a smooth, downward motion. Repeat until the hole is completely filled in. Want to get rid of those stubborn recurring cracks? Reach for Alex Flex Flexible Spackling, which provides maximum flexibility and moves with the repaired surface as problem areas expand and contract with changes in weather and humidity. It’s also easy to sand to a smooth, feathered-edge finish and is paintable for a seamless repair.
-
Paint with Precision
Make the job go easier and faster by having a variety of brushes and rollers on hand. Rollers are great for covering large, wide surfaces, but for a professional look around edges and corners, you’ll need smaller brushes for the right amount of detailed work. Moisten rollers and brushes in water beforehand, as this will help the paint glide more smoothly onto the surface. Allow the first coat of paint to completely dry, and then apply a second coat to ensure smooth, even coverage. Once the second coat is dry, carefully pull up any painter’s tape and voila! Your space is transformed!
For more information on DAP products for your next DIY project, visit DAP.com. (BPT)


Leave a Reply
Want to join the discussion?Feel free to contribute!